Get Studio-Style Headshots Without a Shoot Using an AI Image Generator
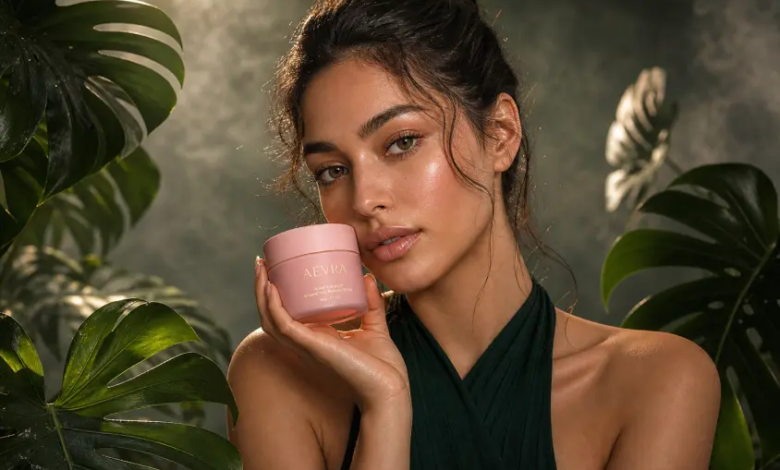
Business profiles, company websites, portfolios, and speaker biographies all benefit from professional headshots, which help to build credibility. Traditional studio sessions require booking, camera gear, lights, and even costly post-production. Dreamina AI provides an alternative solution: converting reference images into studio-quality portrait photos. Lighting, clothing, background, framing, and expressions can be described using detailed prompts. It has image generation and editing capabilities that can accommodate various professional looks without needing to be a design pro. But these are still AI-generated or AI-edited images and not photos taken during a real studio shoot.
Start With a Suitable Reference Photo and a Clear Professional Goal
A good reference photo provides Dreamina AI with valuable visual data regarding your face and proportions. Select a clear, well-lit photo with facial details, natural poses, and minimal distractions. Do not take photos that are heavily filtered, have strong shadows, or include accessories that cover distinctive features. The overall presentation of the portrait should be determined by the intended use. Neutral backgrounds and formal attire work well for corporate profiles, and more expressive styles are good for creative portfolios. In academic biographies, you may want to use understated compositions, while personal brands might want to go with approachable expressions. With Dreamina’s AI Image Generator, you can mix in reference photos and descriptive prompts to experiment with these styles. Always use your own photo or ask permission from the person you are taking a picture of, particularly when sharing identifiable portraits.
Define the Studio Look Through Lighting, Wardrobe, and Composition
Rather than using an ambiguous term like professional headshot, explain the kind of set-up you are looking for. Soft key lighting provides soft definition to the face and helps minimize hard shadows. With subtle rim lighting, you can stand out from darker backgrounds while avoiding harsh lighting. Ask for a level look and a natural head-and-shoulders shot for a professional-looking frame. Indicate items of clothing: dressy jackets, basic shirts, limited colors, suitable fabrics, etc. Depending on your type of work, opt for neutral backgrounds, gentle transitions, or slightly blurred office scenes. A smile or calm demeanor is more likely to come across as natural than posing. Instructions should be kept to a minimum, emphasizing how to present recognizable facial features, age, and natural proportions.
Steps to Get Studio-Style Headshots Without a Shoot Using an AI Image Generator
Step 1: Log in and describe your professional look
- First, sign up or log in to Dreamina to start creating your professional headshot today.
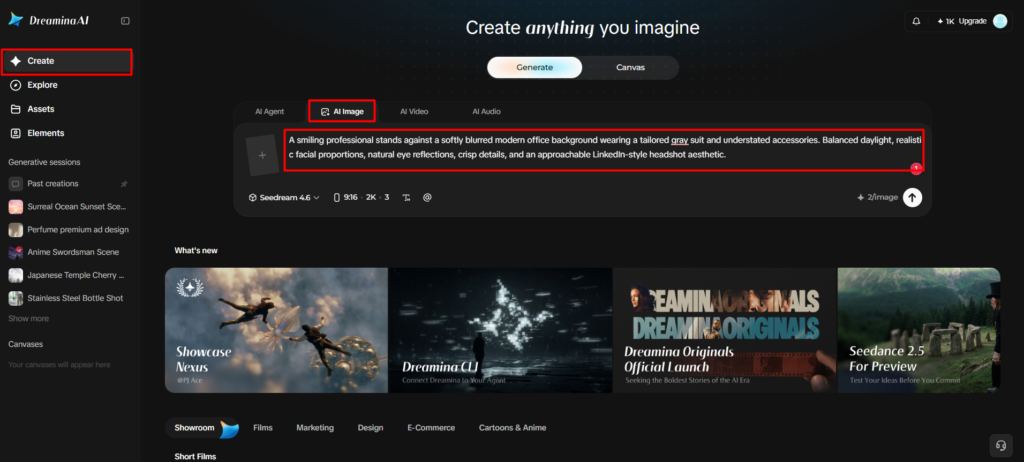
- Next, click the “Create” tab on the left menu, then choose the “AI Image” option.
- Later, write a detailed text prompt describing your outfit, lighting, and the mood you want. Add information on image elements, theme, and concept, such as background color and facial expression.
Step 2: Choose a model and set your headshot format
- Next, select an image model from the options at the bottom of the dialogue box.
- Choose Seedream, GPT Image, or Nano Banana, whichever gives the most realistic look for you.
- Provide a reference image of yourself so Dreamina can make the headshot precise and natural.
- Then, choose the custom aspect ratio and resolution from the “Aspect ratio” and “Resolution” tabs.
- Use the “Images to generate” tab to choose how many headshots you want to create. Open the “Dimensions” tab to set custom dimensions for LinkedIn profile photos and printed resumes.
- If you need a name caption, use the “Draw text on image” tab for it.
- Finally, click the “Generate” tab to begin the creation process for your new studio-style headshots.
Step 3: Refine your headshot and export
- Dreamina then produces the required number of drafts, so check each headshot for natural realism. If something still feels off, use “Edit prompt” or “Regenerate” to refine the generated results.
- Next, apply “Creative upscale” to the generated image for sharper skin detail and overall clarity.
- Moreover, use “Retouch” to correct, clean up, or enhance the details of the selected headshot.
- Choose “Remove” to erase anything distracting from your image, like stray hairs or background objects. Alternatively, use the “Expand” tab to extend the frame for more headroom or breathing space.
- You can continue creating with your generated image by opening the “Generate video” tab to make a video.
- Dreamina offers complete freedom to edit the headshot until you feel fully satisfied with it.
- Finally, click the “Download” tab positioned at the top right of the main editing interface. It saves the image file on your local device for job profiles and online applications.
Recreate Different Studio Portrait Styles With Dreamina AI
The image models, reference inputs, and editing capabilities in Dreamina AI cater to diverse visual directives. Bright, soft light can make approachable corporate portraits, while directional shadows can be used to create more dramatic editorial styling. Formal directories benefit from neutral gray or cream backgrounds, while softly blurred offices offer a professional setting. The clothing and framing also affect the viewer’s perception of the personality and intent of a portrait. Dreamina’s creative agent can try multiple directions to create the image up to 40 times per instruction where available. Compare the various results as one variable (background color, lighting intensity, etc.) is changed. This way, differences are easier to assess and are more consistent in the presentation of professional profiles.
Improve Realism Through Skin Texture, Lighting, and Facial Detail
Convincing headshots maintain natural skin texture rather than smoothing out everything to give it a fabricated look. See if there’s a consistent lighting direction on the face in terms of highlights, catchlights, and shadows. Look for distortions or odd shapes in hairlines, ears, eyeglass frames, collars, and clothing edges. Background separation should make it clear what the subject is, but not be overly blurred or have parts that are unnatural. The Retouch and localized editing features of Dreamina AI can be used to fine-tune specific sections of the image without having to reconstruct the entire scene. Limit corrections to make sure that distinctive features can still be identified. Even in the case of polished products, the work may include incorrect details or facial features that have been changed, and careful visual inspection is necessary before publication.
Use AI Headshots Responsibly in Professional Settings
In professional communication, when a portrait is of a real person, it is important that the identity be accurate. Check all the facts before posting images generated for resumes, company directories, websites, or speaker biographies. Abide by workplace policies and disclosure requirements related to AI-edited photos. Don’t create uniforms, accessories, or backgrounds that falsely suggest qualifications, work, or professional affiliations. Look for privacy before posting recognizable photos on online creative sites. Please read Dreamina AI’s terms of use and the associated organizational requirements before publishing/distributing your results. If photographic authenticity is important, use a photo instead of a synthetic portrait as if it is an unaltered studio portrait.
Conclusion
The portrait creation with Dreamina AI is accessible through reference images, descriptive prompts, various image models, and editing tools, making studio-quality portrait creation accessible and flexible. The ability to try out different professional lighting, wardrobe mixes, backgrounds, and compositions without setting up a traditional shoot. Good results require appropriate references, clear directions, realistic facial expressions, and minimal modifications. In certain cases, AI-generated headshots can cut down on the need for photo shoots, but they will not ensure precise likeness or photographic accuracy. Do a careful inspection of the final image and transparently use the image where it is a real person.